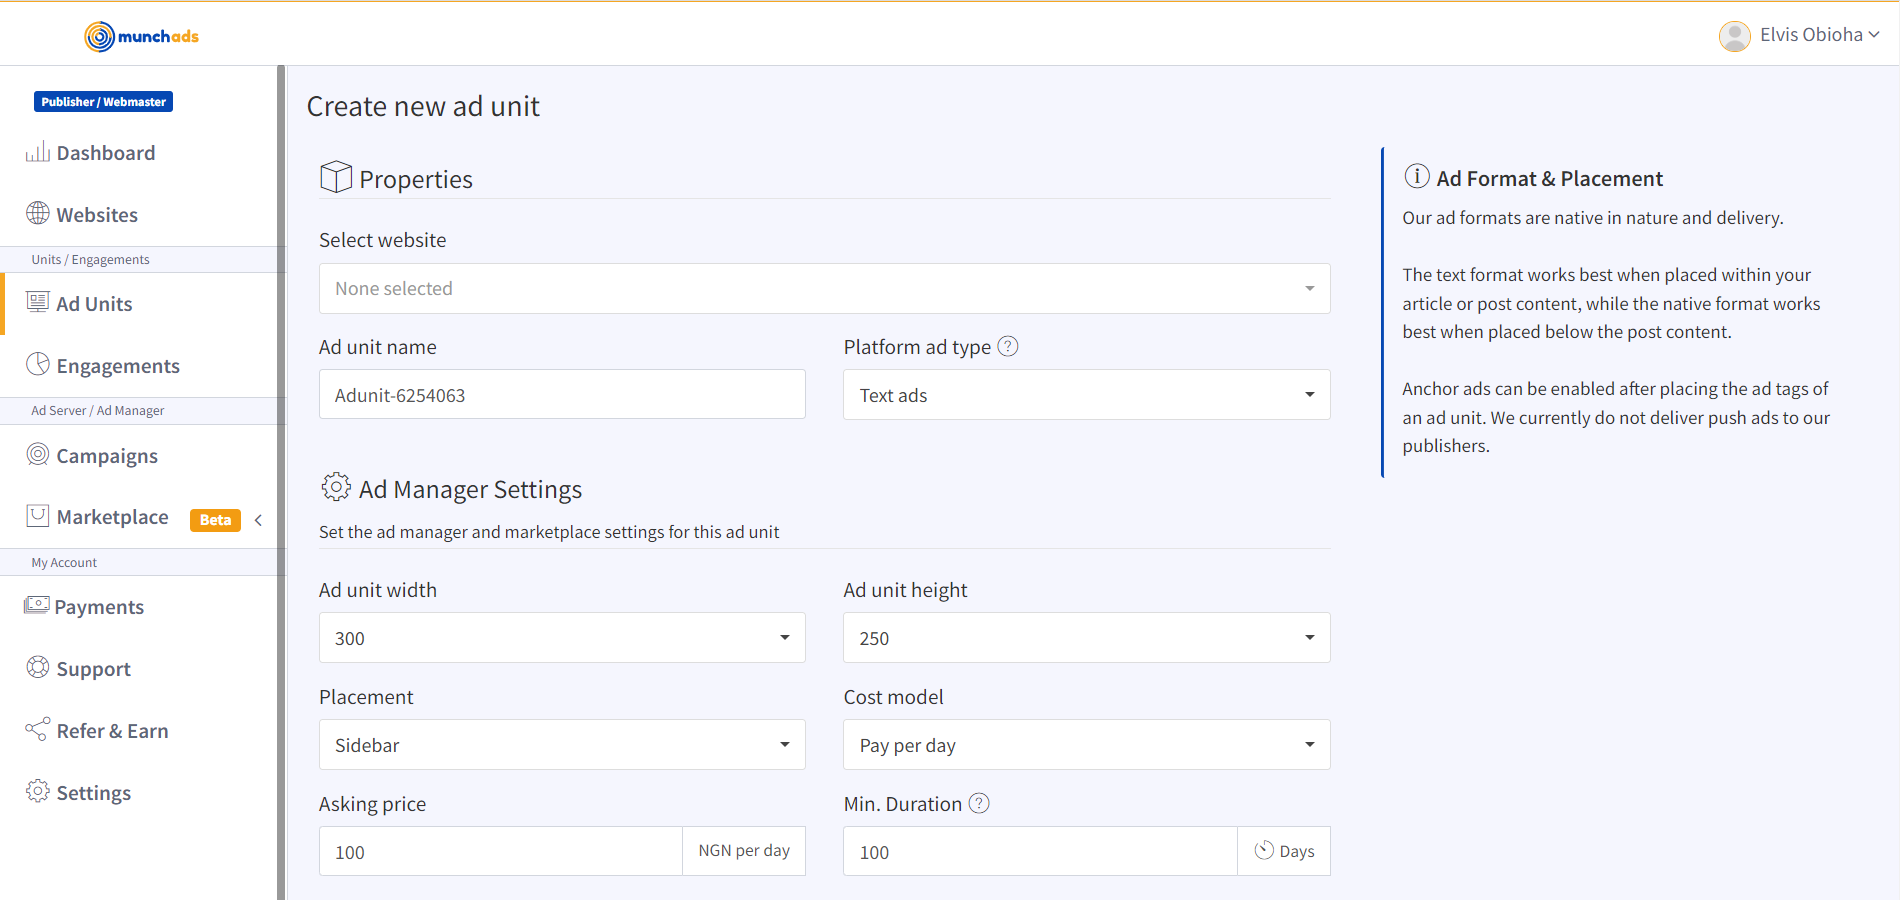
To start serving ads on your approved website/blog, click on the create ad unit button on your dashboard and follow the steps below to create one and install the ad tags properly on your website.
1. Select the website for which this ad unit is to be created
2. Give this ad unit a name that uniquely identifies it and its positioning
3. Select the platform ad format which you would like us to serve to this unit
Ad Manager Settings
These settings help you take advantage of the P2P ad marketplace and the ad server on the platform, they do not affect the ads on our network that we serve automatically to you.
1. Select the height and width of this ad slot, this will appear on the marketplace and will determine the dimension of the ad an advertiser can submit after purchasing your unit on the marketplace
2. Select the placement/positioning of this ad unit
3. Select the cost model you would like to charge advertisers for when they purchase this ad unit
4. Enter an asking price from which advertisers can start making offers for this ad unit
5. Enter a description for this ad unit describing its positioning and attractiveness
6. Enable or disable the listing of the ad unit on the marketplace, you can always change this later
7. Clicking on create will create the ad unit and reveal a button to show the ad tag which you need to place on your website
The marketplace allows you to sell ads directly to advertisers on your terms. The ad server/manager allows you to create campaigns and serve banner ads to your website.
When this unit makes an ad request, we check if it has been sold on the marketplace, and then we check if you are serving banner ads using the ad server; if neither of these is the case, the server then serves ads from our network to this unit.
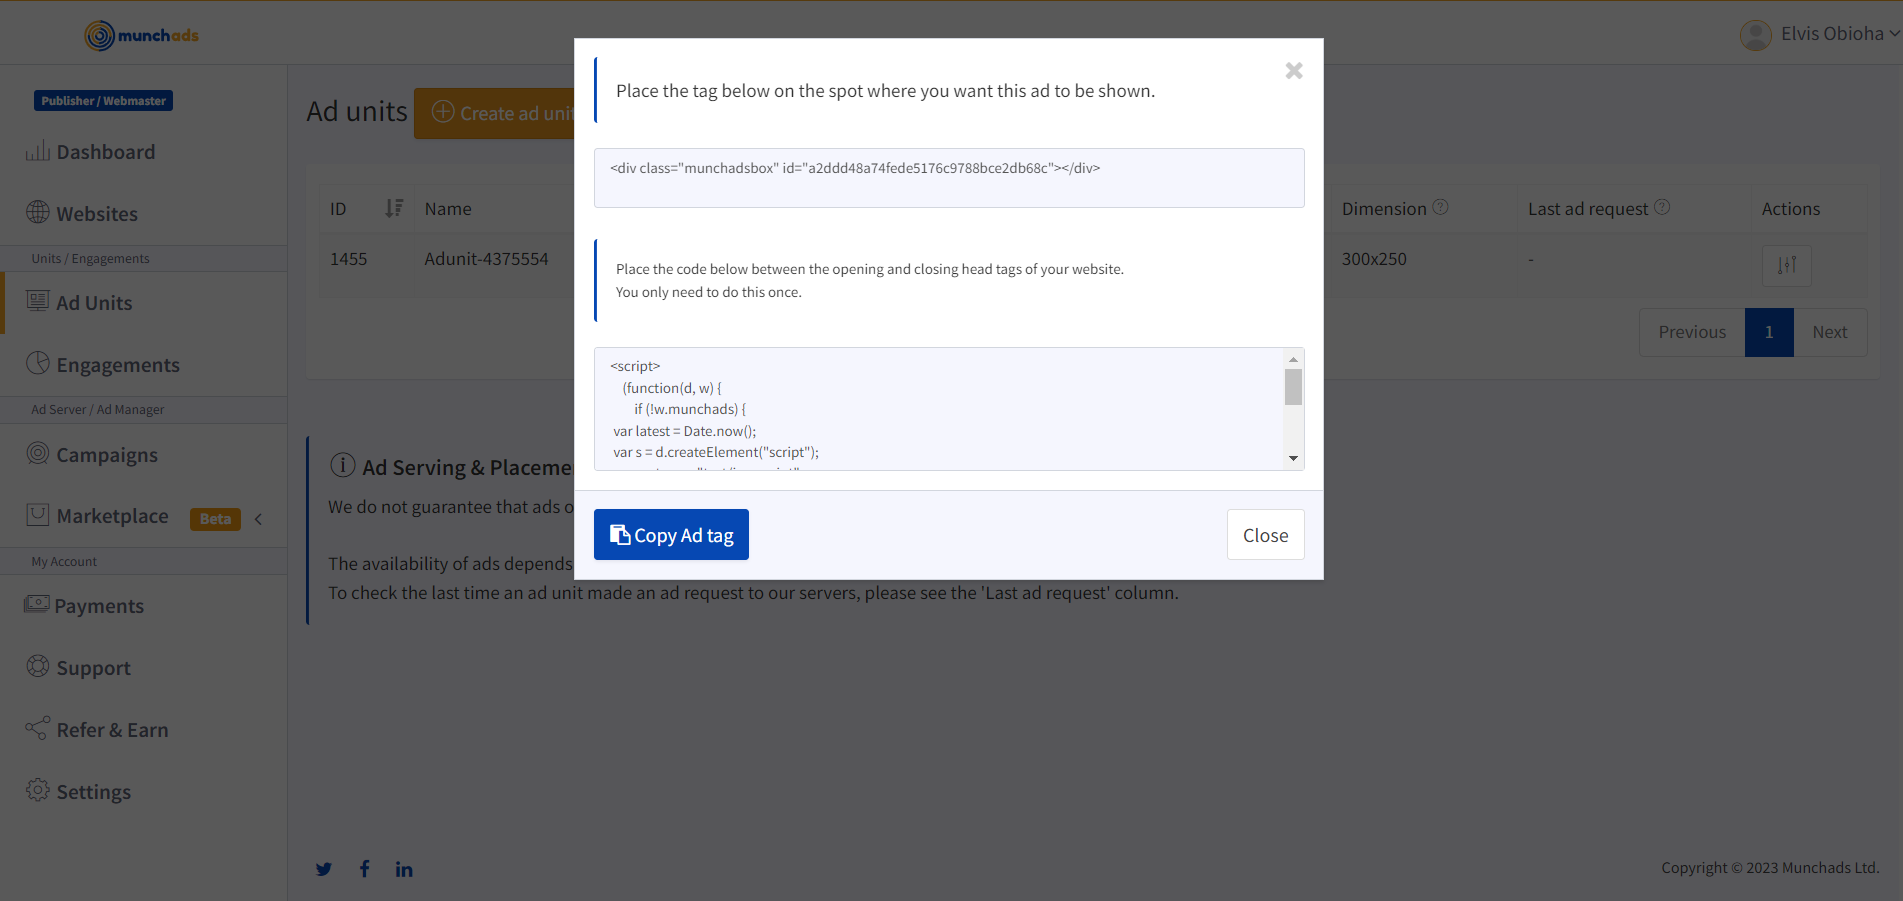
Installing the Ad tag:
 To reveal the ad tag, click on the button that shows up after creating the ad unit or click on the button on the list of ad units on your dashboard.
1. If you are installing our ad tag for the first time, install the ‘<script>’ tag before the closing ‘</head>’ tag of every web page where you want our ads to be served.
You only need to install this script once, and the installation may vary depending on the CMS or platform your website or blog is running on. For users running WordPress CMS, you may a plugin like Ad Inserter for this installation.
2. After installing the script tag, or if you already have the script tag installed, install/place the HTML ‘<div>’ tag on the exact spot or position where you would like us to serve ads for this a unit
3. To verify that you have installed the tags properly, visit the ad unit page of your dashboard and confirm that the ‘Last ad request’ for this ad unit shows a recent date/time. If no date or time is shown, it indicates the tags were not properly installed.


